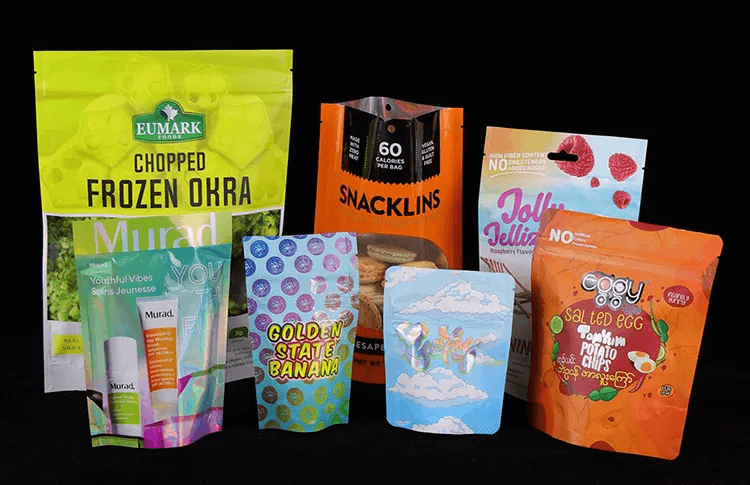
Why are
mylar bags so popular? Mylar is much more durable than most food packaging, including many Foodsaver-style bags. This makes it better for long-term storage, especially under less-than-ideal settings. Vacuum bags are convenient, but they are also transparent, so to provide effective light protection, you must keep items in an opaque tote or similar container. For those who prefer not to use a plastic bag, Mylar is an ideal option.
Mylar also shields against odor detection. So, if you like minced garlic and keep it in a sealed mylar bag, you won't be able to detect it. Mylar pouches are made up of numerous layers of food-grade plastic and aluminum bonded together. Food will not react with the aluminum because a food grade plastic lining isolates it from food. Mylar bags preserve the food within by providing a good light, moisture, and oxygen barrier. You have to Make sure the pouches you buy are good quality and made to store food.
How to seal mylar bags
When heat is applied to the Mylar, it quickly seals. Simply seal the corners of a new pouch with your iron, hair straightener, or flat iron, add the dry food and seal the top shut. You'll need a costly commercial-grade mylar bags vacuum sealer to vacuum seal standard Mylar bags.
When it comes to long-term food storage, mylar sheets are handy. If done correctly, they can keep food for nearly a century. Although utilizing Mylar bags for long-term food storage is simple, it is also relatively easy to make mistakes that could affect your food's preservation. Mylar bags must be heat-sealed, and oxygen absorbers must be included to be successful. They do the majority of the work! To avoid exposing your oxygen absorbers for too long, we recommend having everything you need to shut your bags before opening them.
So, after filling your Mylar bag, you are ready to seal it! Depending on the size of the bag (quart, gallon, or 5 gallons), you can use any heat-sealing method you like. Before completely sealing the bag, leave 6 inches open to drop in your oxygen absorber.

Remember that not all of the mylar bags will appear to be vacuum-sealed and packaged! Only 21% of air contains oxygen, and 4/5 of the air will remain. Yes, the volume decrease is frequently noticeable, but products with a high interstitial air volume will often lack this appearance, even though the operation has worked.
Zip locks will be added to some Mylar bags, but they must still be heat-sealed for long-term food storage. Light, smells, oxygen, and moisture are all blocked by mylar bags. They are not rodent proof while being puncture resistant. This problem can be avoided by storing the mylar bags in a bucket or other sealed rodent-proof container. They are a fantastic alternative for long-term preservation because of their capacity to protect food from the environment.
Filling a mylar bag with dehydrated food and leaving a few inches at the top is storage procedure. Include an oxygen absorber that fits the size of the bag you're using. For a half gallon or gallon mylar bag, one 300cc oxygen absorber is sufficient. Seal the mylar bag quickly by pressing the open end together. When heat is applied to the mylar bag, it simply seals. Seal the open edge with an iron, flat iron, or impulse heat sealer. Label the container and keep it away from rodents.
After you've used up all of your oxygen absorbers, seal them in a vacuum seal bag using your mylar bag's vacuum sealer. They'll keep fresh for several uses. Only shelf-stable foods with moisture and low oil should be packaged in these bags. If Foods are intended for long-term storage, they should have a 10% or less moisture level.
Wheat, white rice, beans, pasta, oats, sugar, and flour are just a few examples of foods that keep well in a Mylar bag. Freeze-dried meals also stay nicely in the Mylar bags. As long as the product is dry, you can package dehydrated fruits and vegetables in Mylar bags with oxygen absorbers. It should crack rather than bend. Botulism poisoning can occur when moist meals are stored in a low-oxygen environment. Don't take any chances! Whole grains last longer in the refrigerator than pulverized grains. Wheat, for example, lasts longer than flour (30+ years) (5 years).
Mylar bags and oxygen absorbers are another technique to store dried food for long-term storage. When all of the bags are full, open the oxygen absorber box and set one on top of the food. Seal the unused absorbers in a small canning jar or a vacuum bag as soon as possible. You can use a specific Mylar bag clip to close the bag's end. This safeguards the oxygen absorbers while facilitating access.
Foodsaver
If you have a Food Saver, you may easily seal smaller gallon or quart bags with it. There has been some uncertainty in the past about utilizing Food Saver machines to heat-seal Mylar bags because, depending on the settings, it may heat-seal before vacuuming out all of the air, which has created some dissatisfaction. It's OK to have air in your bags before sealing them. After all, that's what the oxygen absorber is for! It's critical to swiftly seal the pouches so the oxygen absorbers can perform their job. When you are closing the bags, you are advised not to leave them out for more than 30 minutes. It would be best if you only made as many bags as you can seal in 10 to 15 minutes.
Mylar bags heat seal
A clamshell heat sealer or an impact heat sealer was developed to seal mylar bags. This is by far the simplest method for closing a Mylar bag. They're fantastic because they're portable. They also squeeze, which aids in bag grip.
It makes closing the last 2 inches of the Mylar bag after squeezing out the air a breeze.Although this clamshell sealer is a little costly, it is really simple to use. There are two heat settings on it. The higher temperature is 410 degrees Fahrenheit, which is ideal for sealing Mylar bags.

Using a Flat Iron to Seal Mylar Bags
Yes. A Flat iron or straightener can be used to seal mylar bags.
If you don't want to spend the money on an expensive product, a home iron will be enough. You'll need a piece of wood to place the Mylar bag against while it's being sealed.
It is not impossible to seal mylar bags with an iron. But it can be frustrating because of the oxygen absorbers, especially while working quickly!
A flat iron or hair straightener is my favored way of sealing Mylar bags. One of the simplest, most reliable, and cost-effective ways to seal our bags is with a hair straightening flat iron. This is simple to perform when the bag is upright. The optimum seal is achieved at 375-425 degrees F, the temperature of most hair straightening flat irons, making them excellent for heat sealing laminated foil barrier bags. Simply draw the edges together and push out any trapped air,then use the flat iron to tack the Mylar bag in the center of the top. Then, around the quarter and three-quarter points, tack it. This ensures that no troublesome bubbles remain trapped within the seal. Simply move the flat iron across the top seam until it is entirely sealed after it has been tacked in those three spots. Squeeze the bag gently to examine if there are any openings that enable air to escape. Also, because you'll be sealing the bag horizontally rather than vertically, you can end up with bits of product slipping into the area you're trying to seal.
Mylar Bags Vacuum Sealer

Mylar bags can be sealed with a vacuum sealer. Meat preserved in vacuum-sealed containers will last for about a year in the freezer, and when you take it out, it will taste exactly the same as the day you put it in.
These useful machines draw air out of plastic bags and seal them so that no air gets back in, keeping food fresh for longer and extending its shelf life. The amount of food you're trying to package is another significant factor that impacts the efficacy of a storage strategy. Suppose you have a massive quantity of food and want to portion it so that it may be used on a daily basis. In that case, vacuum sealing the food is the ideal solution for you.
You can easily prepare several useful portions of the food you need on a daily basis and then store it with vacuum sealers because they have options that allow you to customize the size of the bag. If you're preserving food for long-term usage that won't be used regularly, large Mylar bags are the best solution.
Mylar bags are not compatible with all vacuum sealers. Some vacuum sealers offer capabilities that are required to seal mylar bags successfully. If you want to seal mylar bags with a vacuum sealer, ensure sure the vacuum sealer has a sealing bar or a clipper system. The normal Mylar bags will not seal in most household vacuum sealers. You can buy a commercial vacuum sealer that can do this, but they're usually out of reach for most of us.
Except for industrial-grade heavy-duty vacuum sealers, most vacuum sealers overheat when you try to seal too many bags in a sequence. So, to save time and energy as the machine seals the food one by one, simply purchase a Mylar bag, stuff your food inside with oxygen absorbers, and you're ready to go for 15 years.
WHAT TO DO NEXT?

You can transfer the bags to your food storage cupboard if you're sure that they're firmly sealed. A closet, basement, or even under the bed can be used. You should be aware of the six food storage adversaries and keep your food as cool and dry as possible. Put your brick-like food packages in a tightly closed bucket for further protection, especially from pests.
Remember that you may obtain mylar bags that fit in a 5-gallon bucket for extra protection. If you wrap food with Mylar and then seal it with a 5-pound bucket gamma lid, you'll have some pretty safe food for your long-term hoard. Remember that Mylar is not rodent-proof and can be punctured despite its toughness. Food could be stored in mylar bags, but it would be the best to keep it in something that protects the bags from damage. Plastic bins that are cost-effective work well.
Another advantage of buying high-quality Mylar bags is that they may be reused. Remove the contents by cutting the cap off near the seal. Allow the bag to dry thoroughly after washing it. The bag can then be used again. Because you must cut off the sealed piece each time you reuse the bag, it will shrink slightly. It becomes relatively inexpensive if you can reuse the bag three or four times.
It's a great way to save money by preparing your own bulk foods for emergency usage. When the grocery store shelves are bare, you will have your own food stock at home. Walmart, Costco, and LDS Canneries sell bulk items at reasonable prices that, if you put some effort into storing them, you can get a great deal.
Customize Now